Hometown Inspections

  • Home
  • Home Inspections
    • Other Inspections
  • Additional Services
  • Qualifications
    • Our Promise
    • Standards of Practice
    • Code Of Ethics
  • Contact Inspectors
  • Inspector Blog

Essential Spring Maintenance Tasks

4/9/2018

8 Comments

 
Picture
Here’s a quick and essential look at home repairs every homeowner should review and accomplish when Spring has sprung, to enhance home safety and comfort as the warmer months arrive.

After the snows and storms of winter, it’s always a relief to know that Spring is on the horizon once more. However, it’s important to realize that in most parts of the country, even those with gentle weather, the punishing winter season has nevertheless had an effect on your home. For this reason, there are a number of things you should consider accomplishing this Spring in order to prepare your home for the coming warmer months ahead.

To help you to ensure that your home is both safe and in tip-top shape, follow this easy and convenient checklist of home maintenance and repair tasks to accomplish before Spring.
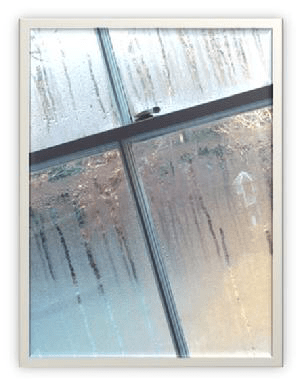
  1. Inspect your windows, and around your windows, for leaks or cracks. Repairing these will not only increase home safety but will save energy and improve your air quality, as well. Consider upgrading your doors and windows for added safety (and better air quality), as well.
  2. Inspect your fences and gates, and mend or reinforce any weak spots you encounter. Doing so will not only discourage criminals but may potentially add property value, as well.
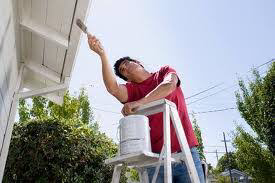
  3. Inspect and replace your exterior lighting bulbs. This is vital for maintaining your home safety, as dark spots or badly lit exteriors can signify a lack of vigilance and may attract thieves.
  4. Inspect and clean your vents and ducts (you’ll need a professional handyman or service Pro to help with this particular task). This task is vital not only for your home’s air quality but also to help prevent the buildup that can become a serious fire risk.
  5. Check your carbon monoxide and smoke detectors for overall functionality, and replace batteries. Also check for the presence of sewer gases in your home, too.
  6. Inspect your Air Conditioner to ensure that it’s in good shape for use. You’ll also want to clean or change your A/C filters at this time, as well.
  7. Clean your gutters and downspouts, as the snows and storms of winter can commonly leave these blocked with leaves, branches, and other detritus.
  8. Clean your carpets to freshen up for Spring and improve your overall air quality. It’s amazing what a difference a clean carpet can make to your everyday well-being.
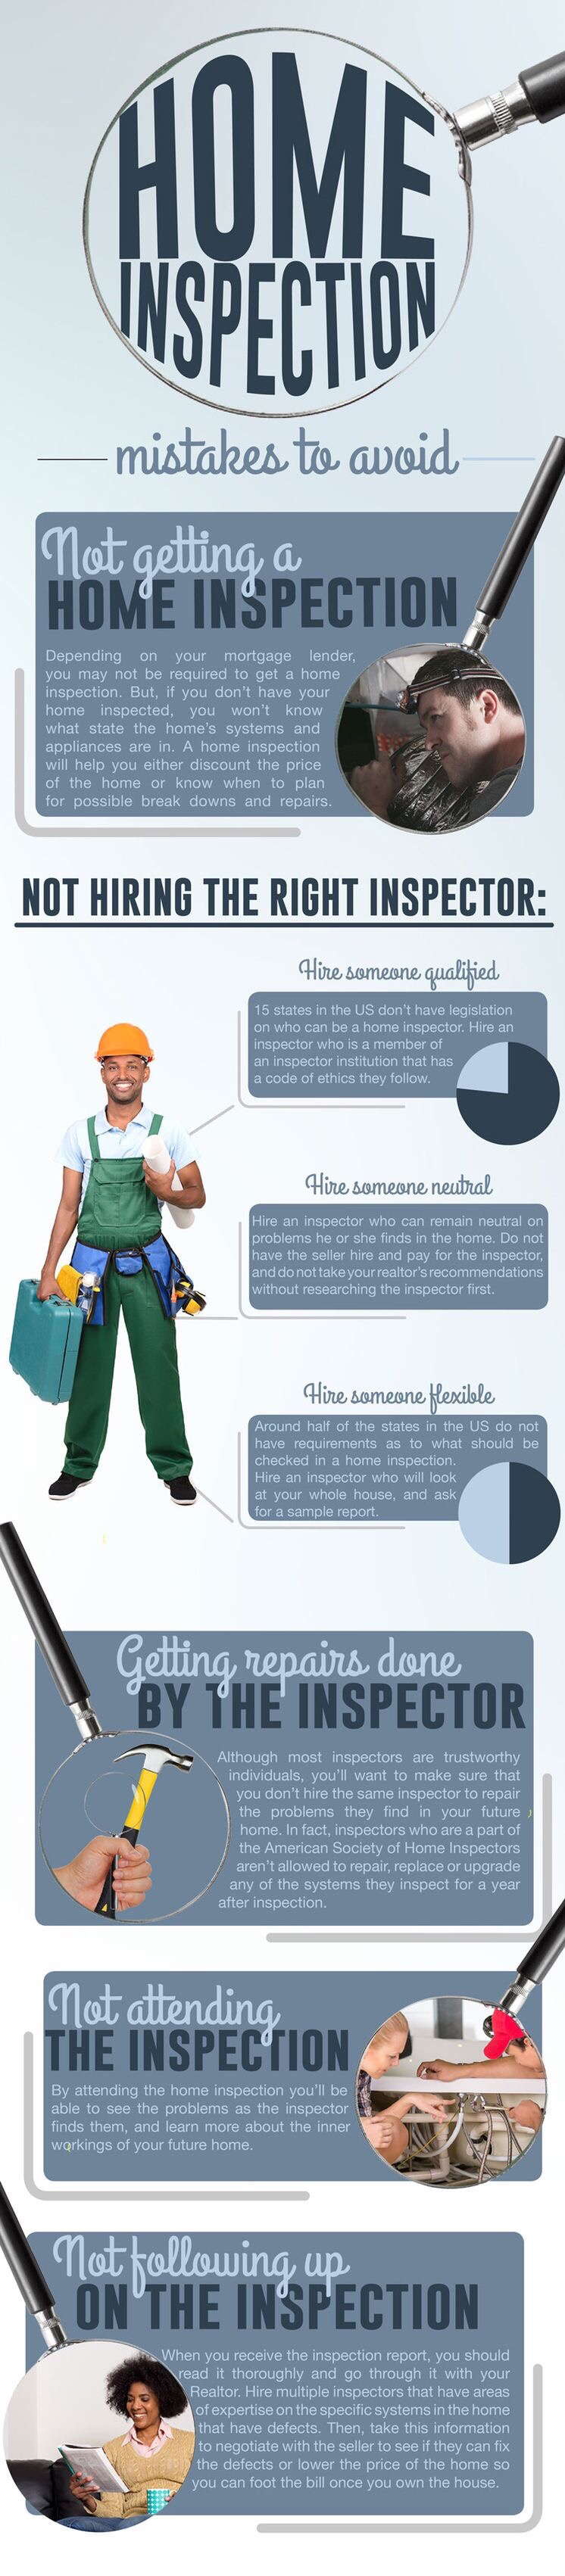
  9. Inspect key appliances and components around the home, from earthquake valves to electrical panels (for correct sizing and wiring, overall electrical health, and more), to your hot water heater, stove, and other appliances. Be sure to ask for a careful look at your hot water heater’s strapping and venting when getting help from a Pro on this, especially in earthquake zones.
  10. Check your Garage Door for proper auto shutoff sensors, as well as for worn-out springs.
These basic tasks can help to ensure that your home will be safer, more energy-efficient, and in great shape for Spring.
8 Comments

Getting Clients Through the Home Inspection Process

1/31/2018

2 Comments


How Can I Guide Clients Through the Home Inspection Process?

Make It Convenient
The home inspection process—from scheduling to report delivery—should be convenient for everyone involved. Online scheduling, text messaging and electronic delivery of reports make convenience possible when it comes to the home inspection. If a home inspection company isn’t providing this, clients are missing out on the best possible experience.

Don’t Keep Them Waiting
Ten years ago, it was commonplace to wait five days or more for a home inspection, but today, consumers want it now. Plus, consumers are busier than ever today. They not only want a home inspection that can be performed soon, but also one that can be performed in half the time of the traditional three- to -four-hour inspection. That’s a large part of what makes HomeTeam successful. Our team approach allows for a faster inspection and more appointment slots each day.

Give Them Options
Clients only want to pay for services they need. While most home inspection companies offer a wide range of services, client needs vary, and the leading home inspection companies allow clients to schedule individual services like pest, mold and radon.

Ensure It’s Educational
A home inspector will not give a pass/fail grade on a home, but will give an objective assessment on the condition of the home during the inspection. Educating the client on their new home and how to maintain it is a sign of a professional inspector. Communicating information in a non-alarming manner is critical to helping clients absorb information and make prudent decisions. An inspector that’s accessible to answer questions onsite and after the inspection instills peace of mind in clients and makes them more confident in their purchase decision.
​

Deliver Accurate Reporting
In addition to a verbal report that the client receives onsite, the most professional inspection companies will furnish a narrative, electronic report that’s emailed to the client and agent. A narrative-style report is more detailed than a checklist-style report, putting forth a clearer picture of the home with less room for interpretation. Including photos and a summary helps the client easily identify any safety concerns or areas that warrant attention.

2 Comments

Why Invest In A Home Inspection Before Putting Your House In The Market

1/15/2018

2 Comments

 
Picture
Ideally, proper home inspection should bother the buyer of a property than the seller or homeowner. It is the buyers that will live in the house; hence must be certain it is a good fit for them. Having this in mind, you may now wonder if it is any use having your home inspected before putting it up for sale.
Truth is; as a homeowner looking to sell a property, you need inspection services just as much as the potential buyer. What follows are some advantages you will get as well as some pitfalls you can avoid when you invest some money getting your home assessed by professional inspectors. Basically, there are two major advantages in doing this. First, you know the great things about your home, and use this knowledge to get as much money as you can from the sale. Second, you know the faults in your property, and use this knowledge to try to give as little concession as possible to the buyer – if the buyer discovers the faults.

Getting the Best Value for Your MoneyIn the world of business, any expenditure that produces profits immediately or in the long-term can be considered as an investment. Following a home inspection, you will have a great knowledge of your home – its selling points to be precise. When you know what your home is worth, you can be sure to make cool cash from flipping it. It is important to know that some buyers or real estate agents will try to devalue your property through calculated statements.
When you meet these people; excellent bargainers who try every trick in the book to make you undersell your property, an assessment report will help you defend the price tag you place on your property. It is recommended that you write down a list of the most impressive things about your property (it will typically also be in the inspection report). And while you continue to emphasize the good things about your home, do not forget to make the buyer realize the assessment is from a paid expert inspector.
Fix It Before They Find ItIn the first point, we considered how you can use the strengths of your property as a bragging right in closing home flippingdeals. But then, there are times when you’ll discover flaws in your home after an inspection. These flaws are typical deal killers and must be eliminated. Blocked gutters, broken pipes, cracks in the wall, tears in the attic, broken doors, shattered window panes and a whole lot of other flaws can drastically affect the price of your property.
On spotting these flaws – after an expert inspection of your property, of course – you need to invest a little more money in effecting repairs. That’s the only way you are ever going to sell your property at the price you want. Should you be uninterested in repairing the damages in your property, you will at least be able to know that they exist; you will not be taken unaware. Again, you can easily strategize on how to bargain with the potential buyer as you would already have an idea of how much money you are willing to slice off your price tag.

Other Reasons to Invest in Home InspectionThe two reasons stated above will help the property seller make as much money as possible from the sale of the property. Making profits, however, is not the only purpose for carrying out inspection. Sometimes, sellers need to give buyers the impression that they (the sellers) care about them. One such way to do this is to cover the expenses of the inspection such that the buyer does not have to pay for the process.
In addition to helping the potential buyer save some money – especially if the buyer is a longtime customer – an inspection report is seen a sign of seriousness on the part of the seller. Some buyers will not even consider buying a property if the property owner does not already have an assessment report in place. In some regions of the world, it is as good as a prerequisite for persuading buyers to pay for a property.
Last ThoughtsFor individuals starting out with home flipping, the big question is whether or not to inspect a home about to be sold. Veterans in the business see things quite differently. They already know the benefits of inspection. What they concern themselves with is when to inspect their homes and how much it will cost. Whether veteran or newbie in the home flipping business, one thing remains common to either type of seller who finally decides to hire a professional for inspection. It is the task of finding the best home inspectors in the neighborhood.
2 Comments

Preventative Home Maintenance Tips You Shouldn't Ignore

11/24/2017

3 Comments

 
Picture
Home maintenance is one of the most crucial tasks for any homeowner. It’s all about maintaining your house, fixtures and fittings to ensure your home stays safe and secure. Of course, there are numerous house maintenance tasks to be done, so the list actually depends on your home.

That being said, there are some basic home maintenance jobs most homeowners should be doing regularly. And if you’re wondereding where to start, these are key preventative maintenance tips you shouldn’t ignore:


Check Your AC Regularly
​Many homes rely on air conditioning systems for a comfortable stay indoors. The last thing you want to do is deal with a busted air conditioner just when you need it most during summer. Check the functionality of your AC by doing a test run of 30 minutes to make sure it’s cooling as expected.

To extend the life of your home’s AC unit, adjust your programmable thermostat by only about 2 to 3 degrees at a time. If anything seems off with your AC unit, call a professional HVAC company to service the unit. Servicing may include lubricating the fan motor, cleaning the condenser or doing some small repairs.


Keep Moisture At Bay
Heat and moisture provide the perfect climate for mold to flourish. Excessive moisture can cause big problems, and mold alone is a huge health risk for you and family. It attracts termites and rodents, causes wood rot and creates issues including a foul odor, surface discoloration and a number of health risks.

According to Restoration Elite, you need to keep dampness inside your home under control by regularly inspecting your roofs for leaks, cleaning your gutters, draining your water heaters once a year and ensuring a cool environment, especially in areas like your kitchen and bathroom.
To identify moisture problems, look out for stains on walls and ceilings, dark areas on pipes under sinks, foul odors indoors and rocking toilets. Any of these could be a sign of a pipe leak. Get a plumbing expert to identify issues, and if there is damage caused by water leaks or moisture, get water damage restoration services as soon as possible.


Eradicate Pests
Pests are one of the biggest threats to a home. Thousands of houses in North America deal with pest infestations ranging from bugs to rodents. Luckily, most pest infestations like termites can be easily avoided if you keep a watchful eye. But while DIY pest control for the occasional cockroach can work, it’s not going to be enough when you have a serious infestation.

Consider taking these preventative measures to keep the pests away:
  • Trim bushes and shrubs touching your home’s exterior (wood destroying pests like termites and carpenter ants can crawl inside your home).
  • Weed thick vegetation around your home to avoid encouraging pests and rodents.
  • Keep bird feeders at a distance of at least 25 ft from your home. Spilled seeds can attract rodents like rats.
If you have identified any form of infestation, seek professional help from an experienced pest control company.


Inspect Plumbing Fittings
It's also important to inspect your plumbingfittings regularly, especially in your kitchen and bathroom. Check your piping, bathroom sinks, toilet and faucets to ensure they are working fine and there are no leaks.

One of the best ways to avoid problems with your plumbing fittings is by buying quality fittings like faucets or modern sink, and ensuring that installation is only done by an expert, licensed plumber.


Check Your Roof
Your roof is what protects a home from the elements. While it’s designed to last, don’t assume everything is fine until you have a problem. After a storm or heavy rains, inspect your roof or get a roofing contractor to inspect it to identify any potential damages. Repairing loose or damaged shingles right away will ensure you don’t have major problems with your roof in the future!

Other maintenance tips include priming your pool to ensure it’s safe for swimming, servicing your sprinkler to save water, keeping your backyard clutter-free, keeping lawns clean and doing repainting work on old walls. With a bit of extra attention and regular care, your home will look great and keep your family safe and comfortable for decades to come!


3 Comments

5 Important Reasons to Get a Home Inspection

11/21/2017

2 Comments

 
Picture
A home is a valuable investment for many people where they enjoy memorable moments with family members and friends. Purchasing a new and well-constructed property brings excitement to the buyer. However, when buying a house, you should not judge the book by its cover. You need to perform research wisely to avoid losing your hard-earned money. Average home buyers cannot unearth costly problems. Therefore, it is advisable to hire the services of a licensed home inspection expert to check the condition of the building before signing a purchasing deal.


You can encounter several problems by letting your building go uninspected by experienced professionals. Some of these dangers include the following:
• Broken roof trusses
• Blocked chimneys
• Missing siding
• Raised roof shingles, which allow water penetration
• Poor ventilation
• Illegal additions


Although home inspection steps may seem tedious, they are instrumental in the home-buying process. Below are important reasons to get a standard home inspection before signing a deal to buy a new house for your family.


Helpful during Price Negotiations

A home inspection report is a beneficial tool that aids the buyer to negotiate the price of the property based on its current situation. It has crucial information about the building. Therefore, during price negotiations, the buyer responds to the seller’s questions using facts.


Moreover, a home inspection report equips potential homeowners with the bargaining power, which helps them to talk down the price. It allows both parties to agree on a reasonable price.


Reveal Illegal Additions

The safety of your family members is a crucial thing to consider. Therefore, when purchasing a house, you should ensure that they will not face dangers. You should hire an expert to inspect a building before buying it to make sure that all the necessary measures were observed during its construction.


Additionally, you should note that some investors build houses for sale in restricted areas. With the aid of a qualified home inspector, you will know the right house to purchase. Once the professional completes the inspection process, you will be aware of several legal issues concerning the building, which will enable you to make a solid decision whether to consider it or not.


Budget Maintenance and Repair Costs

If you do not inspect the house properly before purchasing it, you may incur high repair and maintenance costs. To avoid these losses, you should hire a professional to check areas that require immediate repair. You will request the seller to cater for these expenses before acquiring the property.


Moreover, if the budget goes high, the seller may decide to cut down the initial price of the house. You will get it at a lower price and save thousands of dollars. If you have plans to resell it in the future, you can use this money to renovate it and make profits.


Checking for Structural Defects

If the house that you intend to purchase has structural problems, a home inspection expert will inform you at the right time before negotiating its price. You can hardly see hidden structural defects in the house, even if you take a walk around it for hours.


However, professional inspectors will guide you to ensure you get a home that will meet your expectations.


Uncover Safety Issues

Some houses have several safety issues that you cannot realize without the help of a home inspection expert. If you want to uncover them before buying a house of your dreams, you should hire the services of experienced home inspection professionals.


They will unearth these issues and guarantee your family members safety.


Conclusively, getting a house inspected before buying it brings peace of mind to the buyer. After completing the inspection process, the buyer is confident that the new home is perfect for occupation by the members of the family and friends.
2 Comments

Home Inspection: Mistakes You Want to Avoid

2/3/2017

2 Comments

 
Buying a home involves many different processes, one of which is closing on a home, and getting your potential new abode inspected. Although an inspection doesn’t seem like something that could affect you much during the home buying process, making mistakes during this process can cost you big bucks a few years down the road.
Why? A home inspection that points out the major defects in a home can be used to reduce the price of a home or make the seller fix the problems before selling the house to you, the buyer. If a home has a major defect that you are unaware of, it could cost you thousands of dollars of your own money getting the defects repaired or replaced down the line.
You can save yourself stress and money by making sure you don’t make these mistakes:


Not Getting a Home Inspection
Depending on your mortgage lender, you may not be required to get a home inspection. Purchasing a home without a home inspection isn’t illegal, but it’s not recommended. No matter what home you’re buying, how old it is or how many times it’s been remodeled, you should get a home inspection. If you don’t, you won’t know what state the home’s systems and appliances are in, and you won’t be able to discount the price of the home or plan for possible break downs and repairs.


Not Hiring the Right Inspector
Hire an Inspector Who Will be Neutral. An inspector is one of the only people in a real estate transaction that isn’t paid based on how much the home sells for, so you should hire someone who will give you a neutral point of view when looking at the state of the home. A home inspector who has been recommended by a buyers realtor has proven credentials and should be viewed as trustworthy.


Hire an Inspector Who Meets Certain Qualifications. Unfortunately, there aren’t laws in every state regarding home inspections and the qualifications that an individual needs to become a home inspector. According to The National Association of Home Inspectors, 15 states do not have any legislation about home inspections. You should hire someone who is a part of a home inspector group that has specific ethical guidelines they follow and who can show you their credentials. You should also see if the inspector has errors and omissions insurance so in case they miss something, you won’t have your hands tied.


Hire an Inspector Who Will Look into Every Part of the Home. Much like the lack of legislation on who can be an inspector, only half of the states in the US have specific rules on what should be inspected and what shouldn’t during a home inspection. Make sure you hire someone who will look into all of the parts of a home you want them to inspect. Don’t be afraid to ask them for a sample report.


Getting Work Done by the Inspector You Hired
Although most inspectors are trustworthy individuals, you’ll want to make sure that you don’t hire the same inspector to repair the problems they find in your future home. Instead, ask your Inspector for referrals. All legitimate, ethical Inspectors should have a network of people they have worked with and can comfortably recommend to you. In fact, inspectors who are a part of any National Association, such as Internachi, aren’t allowed to repair, replace or upgrade any of the systems they inspect for a year after inspection.


Not Attending the Inspection
Another mistake that you could make is not attending the home inspection. By attending the home inspection you’ll be able to see the problems as the inspector finds them, and learn more about the inner workings of your future home.


Not Following Up on the Inspection
When you receive the inspection report, you should read it thoroughly and go through it with your realtor. This is when you should follow up on the report. First, hire an contractor that has multiple areas of expertise on the specific systems in the home that have defects. These experts can help you know what kind of problems you’re looking at if you buy the home and how much money you’re going to spend fixing them. Then, take this information to negotiations with the seller to see if the seller wants to fix the defects or lower the price of the home so you can foot the bill.
By avoiding these mistakes, you will end up with a home that’s in better shape, and you will have more money in your pocket. Plus, with a home inspection, the home warranty that may have come on your home will be even more useful. Home warranties can use the home inspection report to see what the state of the home was in when it was purchased.
Picture
2 Comments

Window Condensation

1/10/2017

0 Comments

 
Picture

​Condensation in Double-Paned Windows
by Nick Gromicko and Kenton Shepard


Condensation is the accumulation of liquid water on relatively cold surfaces.

Almost all air contains water vapor, the gas phase of water composed of tiny water droplets. The molecules in warm air are far apart from one another and allow the containment of a relatively large quantity of water vapor. As air cools, its molecules get closer together and squeeze the tiny vapor droplets closer together, as well. A critical temperature, known as the dew point, exists where these water droplets will be forced so close together that they merge into visible liquid in a process called condensation.

Double-pane windows have a layer of gas (usually argon or air) trapped between two panes of glass that acts as insulation to reduce heat loss through the window. Other types of gas used in this space have various effects on heat gain or loss through the window. Some windows also have a thin film installed between panes that separates the space between the panes into two spaces, further reducing heat loss and heat gain through the window. If multiple-pane windows appear misty or foggy, it means that the seal protecting the window assembly has failed.

Silica Desiccant

A desiccant is an absorbent material designed to maintain dryness in the space it protects. In a double-paned window, silica pellets inside the aluminum perimeter strip absorb moisture from any incoming air that enters the space between the panes. If not for the silica desiccant, any moisture in the space between the panes would condense on the glass as the glass cools below the dew point temperature.
Silica gel has an immense surface area, approximately 7,200 square feet per gram, which allows it to absorb large amounts of water vapor. As the sealant protecting this space fails over time, increasing amounts of moisture-containing air will enter the space between the panes, and the silica pellets will eventually become saturated and will no longer be able to prevent condensation from forming. A double-paned window that appears foggy or that has visible condensation has failed and needs to be repaired or replaced.

Why Double-Paned Windows Fail: Solar (Thermal) Pumping
Although double-paned windows appear to be stable, they actually experience a daily cycle of expansion and contraction caused by thermal pumping. Sunlight heats the airspace between the panes and causes the gas there to heat up and expand, pressurizing the space between the panes. At night, the window cools and the space between the panes contracts. This motion acts like the bellows of a forge and is called thermal pumping.

Over time, the constant pressure fluctuations caused by thermal pumping will stress the seal. Eventually, the seal will develop small fractures that will slowly grow in size, allowing increasing amounts of infiltration and exfiltration of air from the space between the panes.

Failure Factors
Windows on the sunny side of a home will experience larger temperature swings, resulting in greater amounts of thermal pumping, seal stress and failure rates.
Vinyl window frames have a higher coefficient of expansion resulting in greater long-term stress on the double-pane assembly, and a higher failure rate. Windows also experience batch failure, which describes production runs of windows, especially vinyl windows, that are defective, meaning that the pane assemblies have been manufactured with seals that have small defects that will cause the window to fail prematurely.

The Nature of Damage
If it’s allowed to continue, window condensation will inevitably lead to irreversible physical window damage. This damage can appear in the following two ways:
  • riverbedding. Condensed vapor between the glass panes will form droplets that run down the length of the window. Water that descends in this fashion has the tendency to follow narrow paths and carve grooves into the glass surface. These grooves are formed in a process similar to canyon formation.
  • silica haze. Once the silica gel has been saturated, it will be eroded by passing air currents and accumulate as white “snowflakes” on the window surface. It is believed that if this damage is present, the window must be replaced.

Detecting Failure
Condensation is not always visible. If the failure is recent, a failed window may not be obvious, since condensation doesn’t usually form until the window is heated by direct sunlight. Windows in the shade may show no evidence of failure, so inspectors should disclaim responsibility for discovering failed double-paned windows.

Thermal Imaging as a Detection Tool
Under the right conditions, it’s possible to use an infrared (IR) camera to detect failed windows. IR cameras are designed to record differences in temperature.
​

Recommendations for Failed Windows
According to industry experts, the glazing assembly can be replaced approximately 75% of the time. Occasionally, the sashes must be replaced, and only about 5% of those cases require that the entire window be replaced.
Inspectors should be aware that there are companies that claim to be able to repair misty windows through a process known as “defogging.”
This repair method proceeds in the following order:
  1. A hole is drilled into the window, usually from the outside, and a cleaning solution is sprayed into the air chamber.
  2. The solution and any other moisture are sucked out through a vacuum.
  3. A defogger device is permanently inserted into the hole that will allow the release of moisture during thermal pumping.
Inspectors should know that there is currently a debate as to whether this process is a suitable repair for windows that have failed, or if it merely removes the symptom of this failure. Condensation appears between double-paned windows when the window is compromised, and removal of this water will not fix the seal itself. A window “repaired” in this manner, although absent of condensation, might not provide any additional insulation. This method is still fairly new and opinions about its effectiveness range widely. Regardless, “defogging” certainly allows for cosmetic improvement, which is of some value to homeowners. It may also reduce the potential for damage caused by condensation in the form of mold or rot. Some skepticism exists about the effectiveness and cost effectiveness of this method of repair.
In summary, condensation in double-paned windows indicates that the glazing assembly has failed and needs repair or replacement.
0 Comments

What to Ask the Seller to Fix

12/28/2016

0 Comments

 
What to ask the seller to fix?
In my opinion, the short answer is: nothing, nada, zip.
Let’s take this common example: The home inspector notes in his report that the roof is near or at the end of its serviceable life, or he checks the “Unsatisfactory” box in the Roof Section of his report. Translation: the house needs a new roof.
Now you, Homebuyer, would certainly want the best and longest-lasting roofing material available, and installation by the most reputable (and likely most expensive) contractor in town. But, in contrast, Mr. Homeseller would opt for the cheapest deal he can find. Understanding this simple dichotomy, who would you rather make choices about the installation of your new roof, you or Mr. Homeseller? Now it is true that in a typical request for repairs, you and your agent would insist that like-materials be installed, that is, materials of similar type and quality. But not all like-materials, and certainly not all contractors and tradesmen, are created equally, and the durability of your new roof depends on both.
Another common conflict of interest in the what-to-ask-the-sellers-to-fix process includes conditions where the home inspector notes something installed improperly, like the added lights and outlets in the garage. It is entirely likely that the homeowner either did it himself, or he had somebody else just as unqualified do it for him. If he should agree to fix it, then most likely yes, he is going to fix it, the guy who did it wrong in the first place.
The best solution, in my not-so-humble opinion, is that once you decide on a list of concerns to request that the seller be responsible for, follow the inspector’s recommendations for further evaluations by qualified specialists, put together written estimates for the conditions that you want addressed, and then negotiate an allowance and/or price reduction for the property.
There are other benefits to this solution. First, it will be you who will have personal contact with the contractor/installer/technician who does the work. Secondly, it will be you who signs the repair agreements and approves the work. Not the seller. Lastly, you may not want like-materials; you will have the opportunity to upgrade to better materials or to downgrade to save a little money.
Picture
0 Comments

Home buyer and seller's guide to Radon

5/3/2015

2 Comments


 The EPA Recommends:

• If you are buying a home or selling your home, have it tested for radon.
 

• For a new home, ask if radon-resistant construction features were used and if the home has been tested.
 

• Fix the home if the radon level is 4 picoCuries per liter (pCi/L) or higher.
 

• Radon levels less than 4 pCi/L still pose a risk, and in many cases, may be reduced.
 

• Take steps to prevent device interference when conducting a radon test.


The EPA estimates that radon causes thousands of cancer deaths in the U.S. each year.

 * Radon is estimated to cause about 21,000 lung cancer deaths per year.

The numbers of deaths from other causes are taken from the Centers for Disease Control and Prevention's 1999-2001 National Center for Injury Prevention and Control Report and 2002 National Safety Council Reports.


Radon is a cancer-causing, radioactive gas.

You cannot see, smell or taste radon. But it still may be a problem in your home.  When you breathe air containing radon, you increase your risk of getting lung cancer.  In fact, the Surgeon General of the United States has warned that radon is the second leading cause of lung cancer in the United States today.  If you smoke and your home has high radon levels, your risk of lung cancer is especially high.


You should test for radon?

Testing is the only way to find out your home's radon levels. The EPA and the Surgeon General recommend testing all homes below the third floor for radon.

You can fix a radon problem.

If you find that you have high radon levels, there are ways to fix a radon problem. Even very high levels can be reduced to acceptable levels.

If You are Selling a Home...

The EPA recommends that you test your home before putting it on the market and, if necessary, lower your radon levels. Save the test results and all information you have about steps that were taken to fix any problems. This could be a positive selling point. 

If You are Buying a Home...

The EPA recommends that you know what the indoor radon level is in any home you are considering buying.  Ask the seller for their radon test results.  If the home has a radon-reduction system, ask the seller for information they have about the system.

If the home has not yet been tested, you should have the house tested.

If you are having a new home built, there are features that can be incorporated into your home during construction to reduce radon levels.

These radon testing guidelines have been developed specifically to deal with the time-sensitive nature of home purchases and sales, and the potential for radon device interference.  These guidelines are slightly different from the guidelines in other EPA publications which provide radon testing and reduction information for non-real estate situations.

This guide recommends three short-term testing options for real estate transactions.  The EPA also recommends testing a home in the lowest level which is currently suitable for occupancy, since a buyer may choose to live in a lower area of the home than that used by the seller.

1. Why do you need to test for radon?

a.Radon has been found in homes all over the U.S.


Radon is a radioactive gas that has been found in homes all over the United States. It comes from the natural breakdown of uranium in soil, rock and water, and gets into the air you breathe. Radon typically moves up through the ground to the air above, and into your home through cracks and other holes in the foundation. Radon can also enter your home through well water. Your home can trap radon inside.

Any home can have a radon problem, including new and old homes, well-sealed and drafty homes, and homes with or without basements. In fact, you and your family are most likely to get your greatest radiation exposure at home. That is where you spend most of your time.

Nearly one out of every 15 homes in the United States is estimated to have an elevated radon level (4 pCi/L or more).  Elevated levels of radon gas have been found in homes in your state. 


b. The EPA and the Surgeon General recommend that you test your home.

Testing is the only way to know if you and your family are at risk from radon. The EPA and the Surgeon General recommend testing all homes below the third floor for radon.


You cannot predict radon levels based on state, local, or neighborhood radon measurements.  Do not rely on radon test results taken in other homes in the neighborhood to estimate the radon level in your home.  Homes which are next to each other can have different radon levels.  Testing is the only way to find out what your home's radon level is.

In some areas, companies may offer different types of radon service agreements.  Some agreements let you pay a one-time fee that covers both testing and radon mitigation, if needed.  


U.S. Surgeon General's
Health Advisory

"Indoor radon gas is the second-leading cause of lung cancer in the United States, and breathing it over prolonged periods can present a significant health risk to families all over the country.  It's important to know that this threat is completely preventable.  Radon can be detected with a simple test, and fixed through well-established venting techniques." 

 January 2005


2. I'm selling a home.  What should I do? 

a. If your home has already been tested for radon...

If you are thinking of selling your home and you have already tested your home for radon, review the Radon Testing Checklist to make sure that the test was done correctly.  If so, provide your test results to the buyer.

No matter what kind of test you took, a potential buyer may ask for a new test, especially if:

• the Radon Testing Checklist items were not met;

• the last test is not recent, (e.g., within two years);

• tou have renovated or altered your home since you tested; or

• the buyer plans to live in a lower level of the house than was tested, such as a basement suitable for occupancy but not currently lived in.

A buyer may also ask for a new test if your state or local government requires disclosure of radon information to buyers.


b. If your home has not yet been tested for radon...

Have a test taken as soon as possible. If you can, test your home before putting it on the market.  You should test in the lowest level of the home which is suitable for occupancy. This means testing in the lowest level that you currently live in or a lower level not currently used, but which a buyer could use for living space without renovations. 

The radon test result is important information about your home's radon level.  Some states require radon measurement testers to follow a specific testing protocol.  If you do the test yourself, you should carefully follow the testing protocol for your area or the EPA's Radon Testing Checklist.  If you hire a contractor to test your residence, protect yourself by hiring a qualified individual or company.

You can determine a service provider's qualifications to perform radon measurements or to mitigate your home in several ways.  Many states require radon professionals to be licensed, certified or registered.  Most states can provide you with a list of knowledgeable radon service providers doing business in your state.  In states that don't regulate radon services, ask the contractor if they hold a professional proficiency or certification credential. Such programs usually provide members with a photo-ID card which indicates their qualification(s) and its expiration date.  If in doubt, you should check with their credentialing organization.  Alternatively, ask the contractor if they've successfully completed formal training appropriate for testing or mitigation, e.g., a course in radon measurement or radon mitigation. 


3. I'm buying a home.  What should I do?

a. If the home has already been tested for radon...

If you are thinking of buying a home, you may decide to accept an earlier test result from the seller, or ask the seller for a new test to be conducted by a qualified radon tester.  Before you accept the seller's test, you should determine the results of previous testing by finding out:

• who conducted the previous test (the homeowner, a radon professional, or some other person);

• where in the home the previous test was taken, especially if you may plan to live in a lower level of the home.  For example, the test may have been taken on the first floor.  However, if you want to use the basement as living space, test there, too;

• what, if any, structural changes, alterations, or changes in the heating, ventilation, and air conditioning (HVAC) system have been made to the house since the test was done.  Such changes may affect radon levels.

If you accept the seller's test, make sure that the test followed the Radon Testing Checklist.  

If you decide that a new test is needed, discuss it with the seller as soon as possible. 


b. If the home has not yet been tested for radon...

Make sure that a radon test is done as soon as possible. Consider including provisions in the contract specifying:

• where the test will be located;

• who should conduct the test;

• what type of test to do;

• when to do the test;

• how the seller and the buyer will share the test results and test costs (if necessary); and

• when radon mitigation measures will be taken, and who will pay for them.

Make sure that the test is done in the lowest level of the home suitable for occupancy. This means the lowest level that you are going to use as living space which is finished or does not require renovations prior to use. A state or local radon official or qualified radon tester can help you make some of these decisions. If you decide to finish or renovate an unfinished area of the home in the future, a radon test should be taken before starting the project, and after the project is finished. Generally, it is less expensive to install a radon-reduction system before (or during) renovations rather than afterward.

4. I'm buying or building a new home.  How can I protect my family?

a. Why should I buy a radon-resistant home?

Radon-resistant techniques work.  When installed properly and completely, these simple and inexpensive passive techniques can help to reduce radon levels.  In addition, installing them at the time of construction makes it easier to reduce radon levels further if the passive techniques don't reduce radon levels below 4 pCi/L.  Radon-resistant techniques may also help to lower moisture levels and those of other soil-gases. 

Radon-resistant techniques:make upgrading easy:  Even if built to be radon-resistant, every new home should be tested for radon after occupancy.  If you have a test result of 4 pCi/L or more, a vent fan can easily be added to the passive system to make it an active system, and further reduce radon levels.

Building radon-resistant features into the house during construction is easier and cheaper than fixing a radon problem from scratch later.  Let your builder know that radon-resistant features are easy to install using common building materials.

save money:  When installed properly and completely, radon-resistant techniques can also make your home more energy-efficient and help you save on your energy costs.


In a new home, the cost to install passive radon-resistant features during construction is usually between $350 to $500.  In some areas, the cost may be as low as $100.  A qualified mitigator will charge about $300 to add a vent fan to a passive system, making it an active system and further reducing radon levels.  In an existing home, it usually costs between $800 to $2,500 to install a radon mitigation system.

b. What are radon-resistant features?

Radon-resistant features may vary for different foundations and site requirements.  If you're having a house built, you can learn about the EPA's Model Standards (and architectural drawings) and explain the techniques to your builder.  If your new house was built (or will be built) to be radon-resistant, it will include these basic elements:

1. gas-permeable layer:  This layer is placed beneath the slab or flooring system to allow the soil gas to move freely underneath the house.  In many cases, the material used is a 4-inch layer of clean gravel.  This gas-permeable layer is used only in homes with basement and slab-on-grade foundations; it is not used in homes with crawlspace foundations.
 

2. plastic sheeting:  Plastic sheeting is placed on top of the gas-permeable layer and under the slab to help prevent the soil gas from entering the home.  In crawlspaces, the sheeting (with seams sealed) is placed directly over the crawlspace floor.
 

3. sealing and caulking:  All below-grade openings in the foundation and walls are sealed to reduce soil-gas entry into the home.
 

4. vent pipe:  A 3- or 4-inch PVC pipe (or other gas-tight pipe) runs from the gas-permeable layer through the house to the roof to safely vent radon and other soil gases to the outside.
 

5. junction boxes:  An electrical junction box is included in the attic to make the wiring and installation of a vent fan easier, if, for example, you decide to activate the passive system if your test results show an elevated radon level (4 pCi/L or more).  A separate junction box is placed in the living space to power the vent-fan alarm.  An alarm is installed along with the vent fan to indicate when the vent fan is not operating properly.

5. How can I get reliable radon test results?

Radon testing is easy and the only way to find out if you have a radon problem in your home.

a. Types of Radon Devices

Since you cannot see or smell radon, special equipment is needed to detect it.  When you're ready to test your home, you can order a radon test kit by mail from a qualified radon measurement service provider or laboratory.  You can also hire a qualified radon tester, very often a home inspector, who will use the radon device(s) suitable to your situation. If you hire a home inspector, make sure you hire a qualified InterNACHI member -- specifically, an IAC2 certified air-quality professional.  The most common types of radon testing devices are listed below.  

Passive Devices

Passive radon-testing devices do not need power to function.  These include charcoal canisters, alpha-track detectors, charcoal liquid scintillation devices, and electret ion chamber detectors, which are available in hardware, drugstores, and other stores; they can also be ordered by mail or phone.  These devices are exposed to the air in the home for a specified period of time, and then sent to a laboratory for analysis.  Both short-term and long-term passive devices are generally inexpensive. Some of these devices may have features that offer more resistance to test interference or disturbance than other passive devices. Qualified radon testers may use any of these devices to measure the home's radon level.

Active Devices

Active radon-testing devices require power to function. These include continuous radon monitors and continuous working-level monitors.  They continuously measure and record the amount of radon and its decay products in the air.  Many of these devices provide a report of this information, which can reveal any unusual or abnormal swings in the radon level during the test period. A qualified tester can explain this report to you.  In addition, some of these devices are specifically designed to deter and detect test interference. Some technically advanced active devices offer anti-interference features.  Although these tests may cost more, they may ensure a more reliable result.

b. General Information for All Devices

A state or local radon official can explain the differences between devices, and recommend the ones which are most appropriate for your needs and expected testing conditions.

Make sure to use a radon measurement device from a qualified laboratory.  Certain precautions should be followed to avoid interference during the test period.  See the Radon Testing Checklist for more information on how to get a reliable test result.


Radon Test Device Placement

The EPA recommends that testing device(s) be placed in the lowest level of the home suitable for occupancy. This means testing in the lowest level (such as a basement) which a buyer could use for living space without renovations. The test should be conducted in a room to be used regularly (such as a family room, living room, play room, den or bedroom); do not test in a kitchen, bathroom, laundry room or hallway.  Usually, the buyer decides where to locate the radon test, based on their expected use of the home.  A buyer and seller should explicitly discuss and agree on the test location to avoid any misunderstanding.  Their decision should be clearly communicated to the person performing the test.

c. Preventing or Detecting Test Interference

There is a potential for test interference in real estate transactions. There are several ways to prevent or detect test interference:

• Use a test device that frequently records radon or decay-product levels to detect unusual swings.

• Employ a motion detector to determine whether the test device has been moved or if testing conditions have changed.

• Use a proximity detector to reveal the presence of people in the room, which may correlate to possible changes in radon levels during the test.

• Record the barometric pressure to identify weather conditions which may have affected the test.

• Record the temperature to help assess whether doors and windows have been opened during the test. 

• Apply tamper-proof seals to windows to ensure closed-house conditions.

• Have the seller/occupant sign a non-interference agreement.

Home buyers and sellers should consult a qualified radon test provider about the use of these precautions.

d. Length of Time to Test

There are two general ways to test your home for radon:

Because radon levels vary from day to day and from season to season, a short-term test is less likely than a long-term test to tell you your year-round average radon level.  However, if you need results quickly, a short-term test may be used to decide whether to fix the home.

Short-Term Testing:

The quickest way to test is with short-term tests. Short-term tests remain in your home from two days to 90 days, depending on the device. There are two groups of devices which are more commonly used for short-term testing. The passive-device group includes alpha-track detectors, charcoal canisters, charcoal liquid scintillation detectors, and electret ion chambers. The active device group consists of different types of continuous monitors.

Whether you test for radon yourself, or hire a state-certified tester or a privately certified tester, all radon tests should be taken for a minimum of 48 hours. A longer period of testing is required for some devices.

Long-Term Testing:

Long-term tests remain in your home for more than 90 days. Alpha-track and electret ion chamber detectors are commonly used for this type of testing. A long-term test will give you a reading that is more likely to tell you your home's year-round average radon level than a short-term test. If time permits, long-term tests (more than 90 days) can be used to confirm initial short-term results. When long-term test results are 4 pCi/L or higher, the EPA recommends mitigating the home.

e. Doing a Short-Term Test...

If you are testing in a real estate transaction and you need results quickly, any of the following three options for short-term tests are acceptable in determining whether the home should be fixed. Any real estate test for radon should include steps to prevent or detect interference with the testing device.

When Choosing a Short-Term Testing Option...

There are trade-offs among the short-term testing options.  Two tests taken at the same time (simultaneous) would improve the precision of this radon test.  One test followed by another test (sequential) would most likely give a better representation of the seasonal average.  Both active and passive devices may have features which help to prevent test interference.  Your state radon office can help you decide which option is best.


Short-Term Testing Options

What to Do Next

Passive:
Take two short-term tests at the same time in the same location for at least 48 hours.  

or 

Take an initial short-term test for at least 48 hours.  Immediately upon completing the first test, do a second test using an identical device in the same location as the first test.


Fix the home if the average of two tests is 4 pCi/L or more.


Fix the home if the average of the two tests is 4 pCi/L or more.

Active:

Test the home with a continuous monitor for at least 48 hours.


Fix the home if the average radon level is 4 pCi/L or more.

f.  Using testing devices properly for reliable results.

If you do the test yourself:

When you are taking a short-term test, close windows and doors and keep them closed, except for normal entry and exit.  If you are taking a short-term test lasting less than four days, be sure to:

• Close your windows and outside doors at least 12 hours before beginning the test.

• Do not conduct short-term tests lasting less than four days during severe storms or periods of high winds.

• Follow the testing instructions and record the start time and date.

• Place the test device at least 20 inches above the floor in a location where it will not be disturbed and where it will be away from drafts, high heat, high humidity, and exterior walls.

• Leave the test kit in place for as long as the test instructions say.

• Once you have finished the test, record the stop time and date, re-seal the package, and return it immediately to the lab specified on the package for analysis.

You should receive your test results within a few weeks. If you need results quickly, you should find out how long results will take and, if necessary, request expedited service.

If you hire a qualified radon tester:

In many cases, home buyers and sellers may decide to have the radon test done by a qualified radon tester who knows the proper conditions, test devices, and guidelines for obtaining a reliable radon test result.  They can also:

• evaluate the home and recommend a testing approach designed to make sure you get reliable results;

• explain how proper conditions can be maintained during the radon test;

• emphasize to occupants of a home that a reliable test result depends on their cooperation.  Interference with, or disturbance of, the test or closed-house conditions will invalidate the test result;

• analyze the data and report measurement results; and

• provide an independent test.

g. Interpreting Radon Test Results

The average indoor radon level is estimated to be about 1.3 pCi/L; roughly 0.4 pCi/L of radon is normally found in the outside air. The U.S. Congress has set a long-term goal that indoor radon levels be no more than outdoor levels. While this goal is not yet technologically achievable for all homes, radon levels in many homes can be reduced to 2 pCi/L or below.

Radon Test Results Reported in Two Ways

Your radon test results may be reported in either picoCuries per liter of air (pCi/L) or working levels (WL). If your test result is in pCi/L, the EPA recommends you fix your home if your radon level is 4 pCi/L or higher. If the test result is in WL, the EPA recommends you fix the home if the working level is 0.02 WL or higher.  Some states require WL results to be converted to pCi/L to minimize confusion.

Sometimes, short-term tests are less definitive about whether the home is at or above 4 pCi/L, particularly when the results are close to 4 pCi/L. For example, if the average of two short-term tests is 4.1 pCi/L, there is about a 50% chance that the year-round average is somewhat below 4 pCi/L. 

However, the EPA believes that any radon exposure carries some risk; no level of radon is safe. Even radon levels below 4 pCi/L pose some risk.  You can reduce your risk of lung cancer by lowering your radon level.

As with  other environmental pollutants, there is some uncertainty about the magnitude of radon health risks. However, we know more about radon risks than risks from most other cancer-causing substances. This is because estimates of radon risks are based on data from human studies on underground miners. Additional studies on more typical populations are underway.

Your radon measurement will give you an idea of your risk of getting lung cancer from radon. Your chances of getting lung cancer from radon depend mostly on:

• tour home's radon level; 

• the amount of time you spend in your home; and

• whether you are a smoker or have ever smoked.

Smoking combined with radon is an especially serious health risk. If you smoke or are a former smoker, the presence of radon greatly increases your risk of lung cancer. If you stop smoking now and lower the radon level in your house, you will reduce your lung cancer risk.

Based on information contained in the National Academy of Sciences' 1998 report, The Health Effects of Exposure to Indoor Radon, your radon risk may be somewhat higher than shown, especially if you have never smoked.  It's never too late to reduce your risk to lung cancer.  Don't wait to test and fix a radon problem.  If you are a smoker, stop smoking.

Go to the Radon Risk Comparison Charts

Radon Testing Checklist

For reliable test results, follow this Radon Testing Checklist carefully.  Testing for radon is not complicated.  Improper testing may yield inaccurate results and require another test.  Disturbing or interfering with the test device or with closed-house conditions may invalidate the test results, and is actually illegal in some states.  If the seller or qualified tester cannot confirm that all items have been completed, take another test.

Before conducting a radon test:

• Notify the occupants of the importance of proper testing conditions. Give the occupants written instructions or a copy of this Guide and explain the directions carefully.

• Conduct the radon test for a minimum of 48 hours; some test devices have a minimum exposure time greater than 48 hours.

• When doing a short-term test ranging from two to four days, it is important to maintain closed-house conditions for at least 12 hours before the beginning of the test and during the entire test period.

• When doing a short-term test ranging from four to seven days, the EPA recommends that closed-house conditions be maintained.

• If you conduct the test yourself, use a qualified radon measurement device and follow the laboratory's instructions.  Your state may be able to provide you with a list of do-it-yourself test devices available from qualified laboratories.

• If you hire someone to do the test, hire only a qualified individual.  Some states issue photo identification (ID) cards; ask to see it.  The tester's ID number, if available, should be included or noted in the test report.

• The test should include method(s) to prevent or detect interference with testing conditions, or with the testing device itself.

• If the house has an active radon-reduction system, make sure the vent fan is operating properly.  If the fan is not operating properly, have it (or ask to have it) repaired and then test it.

"Closed-house conditions" mean keeping all windows closed, keeping doors closed except for normal entry and exit, and not operating fans or other machines which bring in air from outside.  Fans that are part of a radon-reduction system or small exhaust fans operating for only short periods of time may run during the test.


During a radon test:

• Maintain closed-house conditions during the entire time of a short-term test, especially for tests shorter than one week.

• Operate the home's heating and cooling systems normally during the test. For tests lasting less than one week, operate only air-conditioning units which re-circulate interior air.

• Do not disturb the test device at any time during the test.

• If a radon-reduction system is in place, make sure the system is working properly and will be in operation during the entire radon test.

After a radon test:

• If you conduct the test yourself, be sure to promptly return the test device to the laboratory.  Be sure to complete the required information, including start and stop times, test location, etc.

• If an elevated level is found, fix the home. Contact a qualified radon-reduction contractor about lowering the radon level.  The EPA recommends that you fix the home when the radon level is 4 pCi/L or more.

• Be sure that you or the radon tester can demonstrate or provide information to ensure that the testing conditions were not violated during the testing period.


6. What should I do if the radon level is high?

a. High radon levels can be reduced.

The EPA recommends that you take action to reduce your home's indoor radon levels if your radon test result is 4 pCi/L or higher. It is better to correct a radon problem before placing your home on the market because then you will have more time to address a radon problem. 

If elevated levels are found during the real estate transaction, the buyer and seller should discuss the timing and costs of the radon reduction.  The cost of making repairs to reduce radon levels depends on how your home was built and other factors. Most homes can be fixed for about the same cost as other common home repairs, such as painting or having a new hot water heater installed. The average cost for a contractor to lower radon levels in a home can range from $800 to about $2,500.

b. How To Lower The Radon Level In Your Home

A variety of methods can be used to reduce radon in homes. Sealing cracks and other openings in the foundation is a basic part of most approaches to radon reduction. The EPA does not recommend the use of sealing alone to limit radon entry.  Sealing alone has not been shown to lower radon levels significantly or consistently. 

 In most cases, a system with a vent pipe and fan is used to reduce radon.  These "sub-slab depressurization" systems do not require major changes to your home. Similar systems can also be installed in homes with crawlspaces.  These systems prevent radon gas from entering the home from below the concrete floor and from outside the foundation.  Radon mitigation contractors may use other methods that may also work in your home. The right system depends on the design of your home and other factors. 

Radon and Home Renovations


If you are planning any major renovations, such as converting an unfinished basement area into living space, it is especially important to test the area for radon before you begin.

If your test results indicate an elevated radon level, radon-resistant techniques can be inexpensively included as part of the renovation. Major renovations can change the level of radon in any home.  Test again after the work is completed.

You should also test your home again after it is fixed to be sure that radon levels have been reduced. If your living patterns change and you begin occupying a lower level of your home (such as a basement) you should re-test your home on that level. In addition, it is a good idea to re-test your home sometime in the future to be sure radon levels remain low.

c. Selecting a Radon-Reduction (Mitigation) Contractor

Select a qualified radon-reduction contractor to reduce the radon levels in your home.  Any mitigation measures taken or system installed in your home must conform to your state's regulations.  

The EPA recommends that the mitigation contractor review the radon measurement results before beginning any radon-reduction work.  Test again after the radon mitigation work has been completed to confirm that previous elevated levels have been reduced.  

d. What can a qualified radon-reduction contractor do for you?

A qualified radon-reduction (mitigation) contractor should be able to:

• review testing guidelines and measurement results, and determine if additional measurements are needed;

• evaluate the radon problem, and provide you with a detailed, written proposal on how radon levels will be lowered;

• design a radon-reduction system;

• install the system according to EPA standards, or state or local codes; and

• make sure the finished system effectively reduces radon levels to acceptable levels.

Choose a radon-mitigation contractor to fix your radon problem just as you would for any other home repair.  You may want to get more than one estimate.  Ask for and check their references.  Make sure the person you hire is qualified to install a mitigation system.  Some states regulate or certify radon-mitigation services providers.

Be aware that a potential conflict of interest exists if the same person or firm performs the testing and installs the mitigation system.  Some states may require the homeowner to sign a waiver, in such cases. Contact your state radon office for more information.

e. Radon in Water

The radon in your home's indoor air can come from two sources:  the soil and your water supply.  Compared to radon entering your home through water, radon entering your home through soil is a much larger risk.  If you've tested for radon in air and have elevated radon levels, and your water comes from a private well, have your water tested.  The devices and procedures for testing your home's water supply are different from those used for measuring radon in air.

The radon in your water supply poses an inhalation risk and an ingestion risk.  Research has shown that your risk of lung cancer from breathing radon in the air is much larger than your risk of stomach cancer from swallowing water with radon in it.  Most of your risk from radon in water comes from radon released into the air when water is used for showering and other household purposes.

Radon in your home's water is not usually a problem when its source is surface water.  Radon in water is more likely when its source is ground water, e.g., a private well or a public water supply system that uses ground water.  Some public water systems treat their water to reduce radon levels before it is delivered to your home.  If you are concerned that radon may be entering your home through the water, and your water comes from a public water supply, contact your water supplier.

If you've tested your private well and have radon in your water supply, it can be treated in one of two ways.  Point-of-entry treatment can effectively remove radon from the water before it enters your home.  Point-of-entry treatment usually employs either granular activated-carbon (GAC) filters, or aeration devices.  While GAC filters usually cost less than aeration devices, filters can collect radioactivity and may require a special method of disposal.  Point-of-use treatment devices remove radon from your water at the tap, but only treat a small portion of the water you use, e.g., the water you drink.  Point-of-use devices are not effective in reducing the risk of breathing radon released into the air from all water used in the home.

Picture
2 Comments

Mold in Homes: Fact vs. Fears

3/23/2015

5 Comments

 
Original Article Compliments of Home Owners Network

Molds must have hired a public relations consultant.  Molds, especially black mold, are getting more press coverage now than they have during their billion plus year existence on our planet.  Here are some facts to help you use informed thought instead of hype when thinking about mold, mold testing, and mold remediation. 

  • Mold is everywhere (and has been for a very long time).  It’s in your home right now. 
  • Mold causes allergic reactions in some people; however,there is no proven link between mold and more serious conditions in otherwise healthy people.  There is evidence of serious allergic reactions by some people to some molds.  These reactions are rare and usually occur in people with other health conditions such as compromised immune systems.  Consult a doctor if you have questions about the health effects of mold. 
  • Mold needs food, water, and the right temperature to grow.  We can’t do much about the food and temperature.  We can do something about the water. 
  • Mold’s presence in excessive amounts is a symptom of a failure to properly control water in the home.  Controlling water in the home will go a long way toward curing mold (and other) problems. 
  • There are no independent, peer-reviewed standards about acceptable levels of exposure to mold. 


Based on our research and experience, we believe that the following recommendations are appropriate for most homeowners. 
  • Control mold by controlling water in the home.  Fix water leaks, establish proper drainage away from the foundation of the home, and use kitchen and bath exhaust fans ducted to the outdoors. 
  • Ensure that your heating and cooling system is operating properly and is properly maintained.  Have the system professionally serviced at least once per year.  Have the system evaluated if it cycles between running for short time periods and not running for short time periods (short cycles).  Change your filters regularly.  Pour about 1/2 cup of bleach into the condensate drain pipe at least once a year.  Have the evaporator coils and drip pan professionally cleaned as needed. 
  • Clean small areas of surface mold with detergent.  Remove and replace heavily water-damaged materials.  Use care when working with mold-infested materials and with chemicals.  Mold spores can disperse when disturbed and can contaminate other areas.  Mold infested and damaged surfaces in excess of about 10 square feet should be referred to a certified mold remediation specialist.
 
The Bottom Line

Mold is a symptom of a problem, not the problem itself.  Remove the symptom (mold) and the symptom will return.  Fix the problem (water where it shouldn't be) and the symptom will not return.  Sometimes finding and curing a water problem is easy.  Many times, however, finding the problem requires experience and special equipment.  Don’t be reluctant to ask for help if you have a water problem that you can’t solve. 

5 Comments
<<Previous

    Archives

    May 2015
    March 2015
    February 2015
    January 2015
    October 2014
    September 2014

    Categories

    All
    Buyers
    Homeowners

    RSS Feed

Powered by Create your own unique website with customizable templates.
Photo used under Creative Commons from Pentax K-x Connecticut Man